环境搭建 - .NET4
1 准备工作
1.1 安装 vc_resit 2022
若本机已经安装了Visual Studio 2022则可略过此步骤。
在Windows下,AnyCAD Rapid SDK依赖Vistual C++ 运行时库,64位版本需要在客户机上安装vc_redist.x64.exe,32位版本需要安装vc_redist.x86.exe。
建议vc_redist.x64.exe和vc_redist.x86.exe都安装
微软官方下载地址:
- x86: vc_redist.x86.exe
- x64: vc_redist.x64.exe
1.2 安装.NET Framework 4.8
若本机已经安装了Visual Studio 2022则可略过此步骤。
若开发环境低于VS2022,则需要安装.NET Framework 4.8
微软官方下载地址:
1.3 下载AnyCAD Rapid .NET SDK
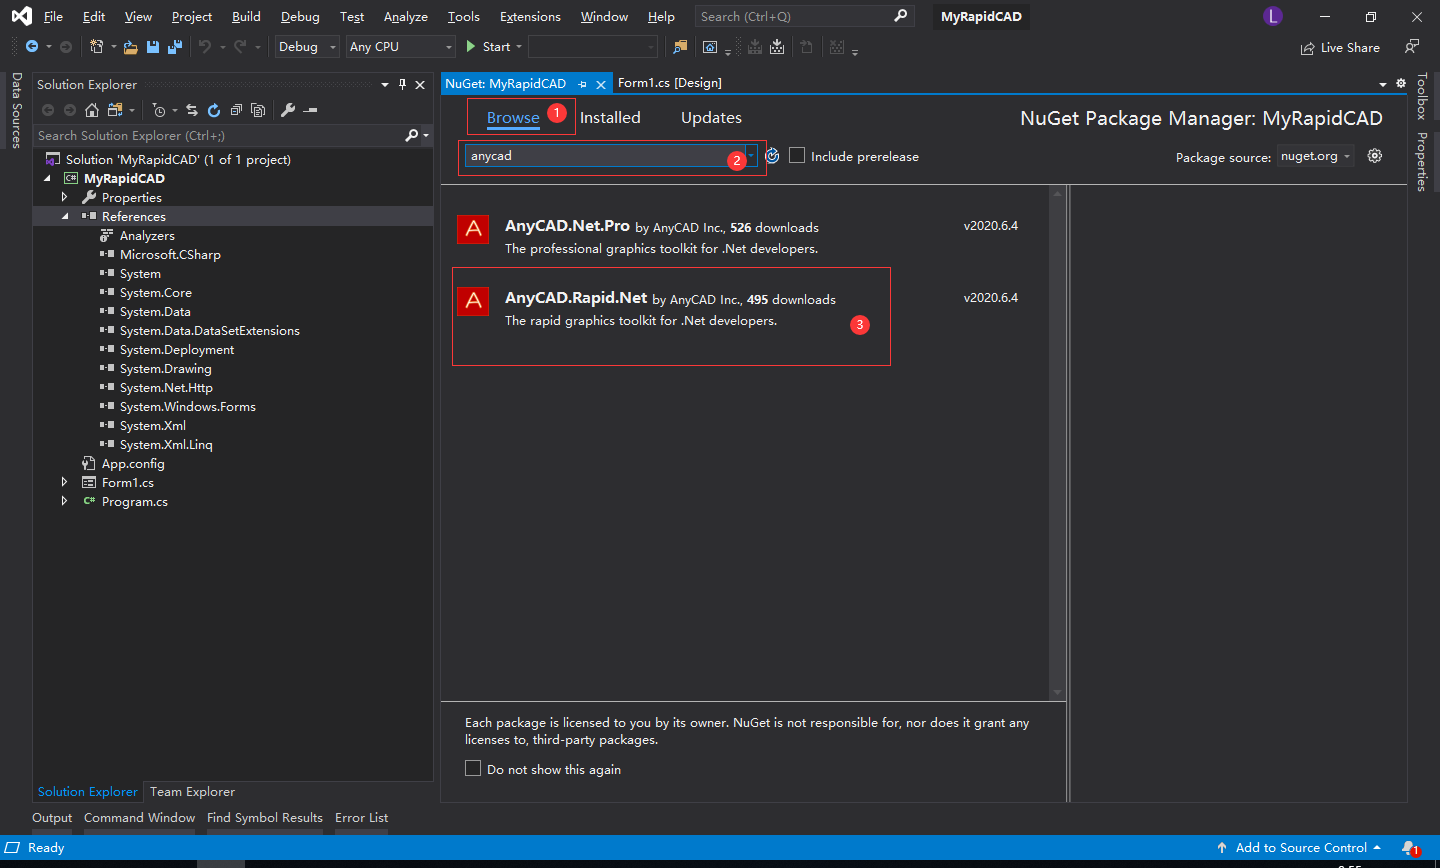
AnyCAD基于nuget包管理工具来管理.NET库,提供两种方式下载:
在Visual Studio的nuget包管理器中搜索anycad。
或者打开AnyCAD Nuget Package,下载离线包。
- AnyCAD微信公众号
关注AnyCAD微信公众号,及时获取最新版本SDK更新推送信息:

1.4 示例代码下载
使用git直接clone:
git clone https://gitee.com/anycad/anycad.rapid.net.sample.git
直接下载sample示例:
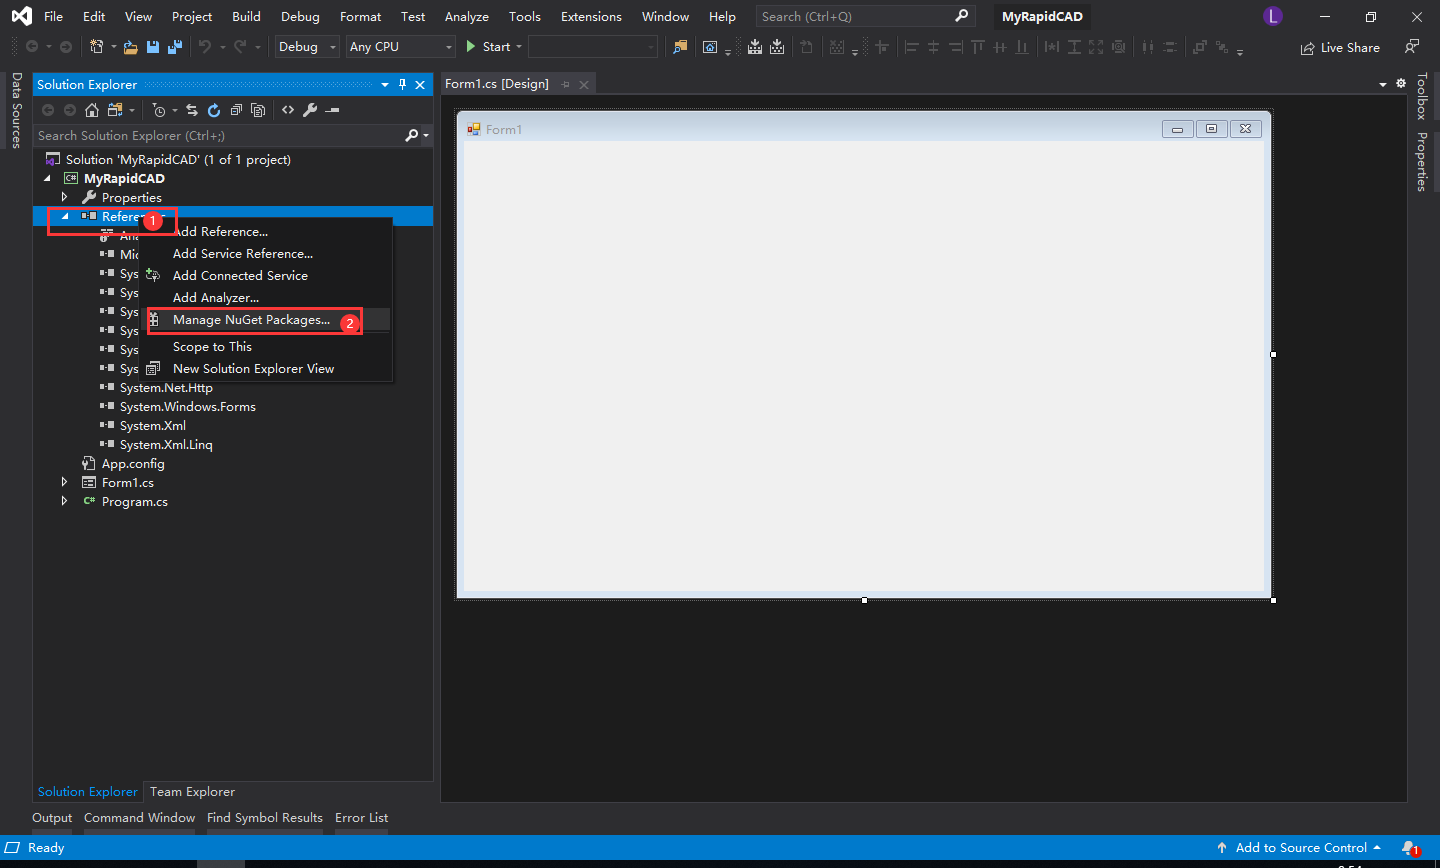
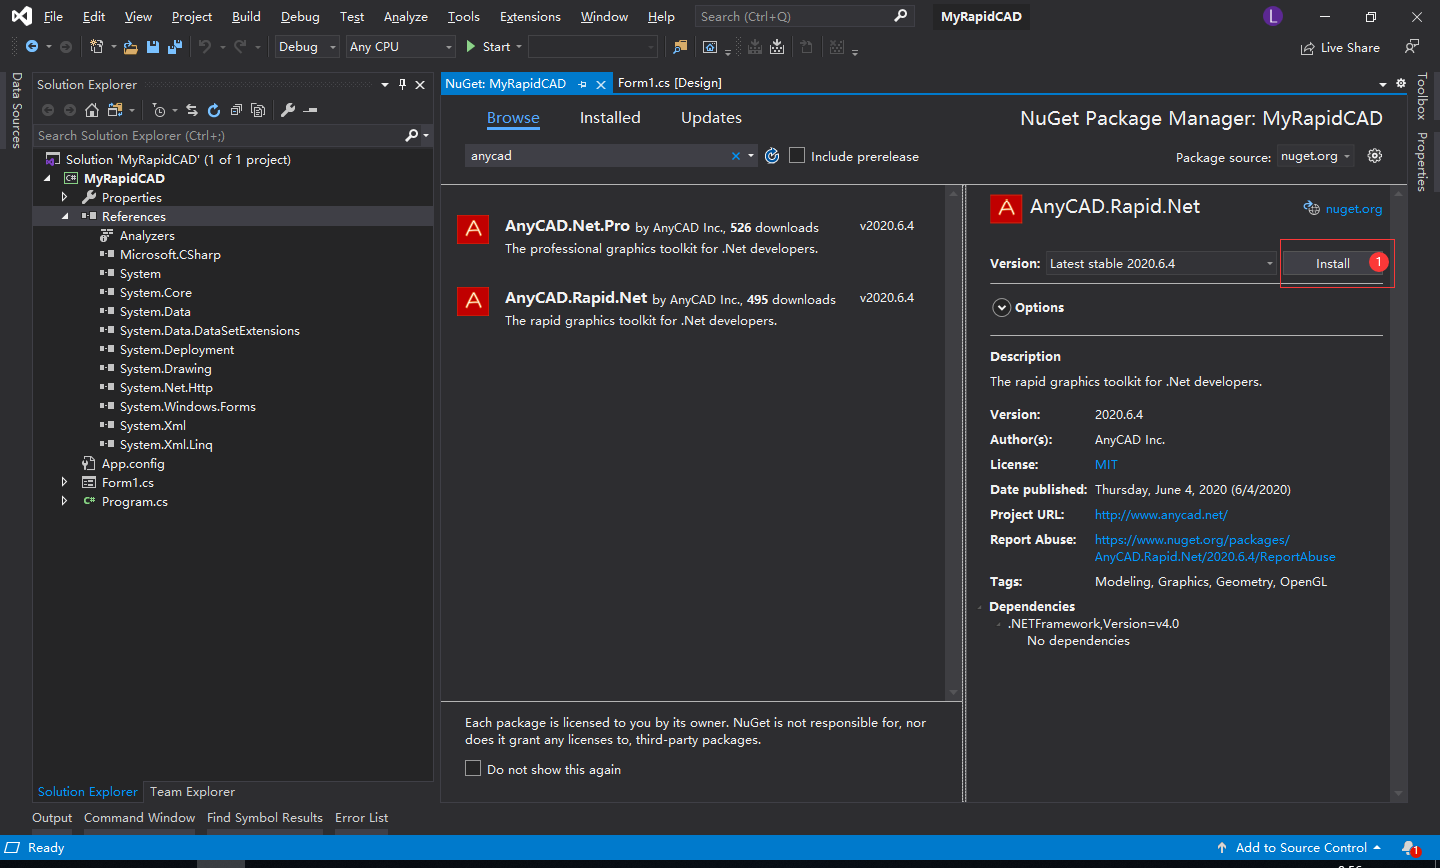
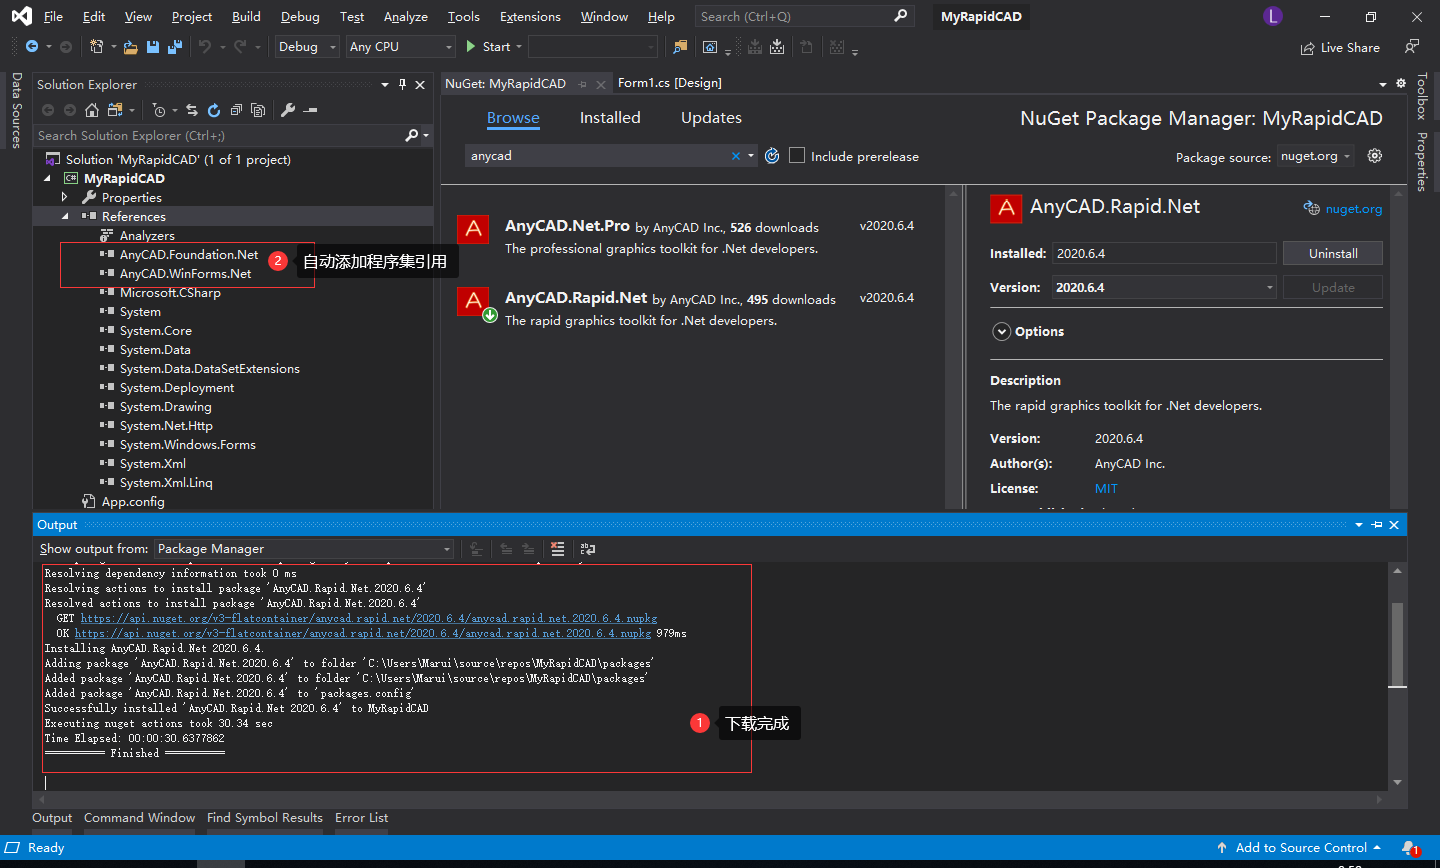
2 添加程序集引用
使用nuget自动添加.NET程序集引用
TIP
- 若访问nuget很慢,可以关注anycad微信公众号,下载最新离线版本的Nuget包。
- 参考《本地Nuget服务器配置》一文配置本地Nuget服务
3 工程项目属性设置
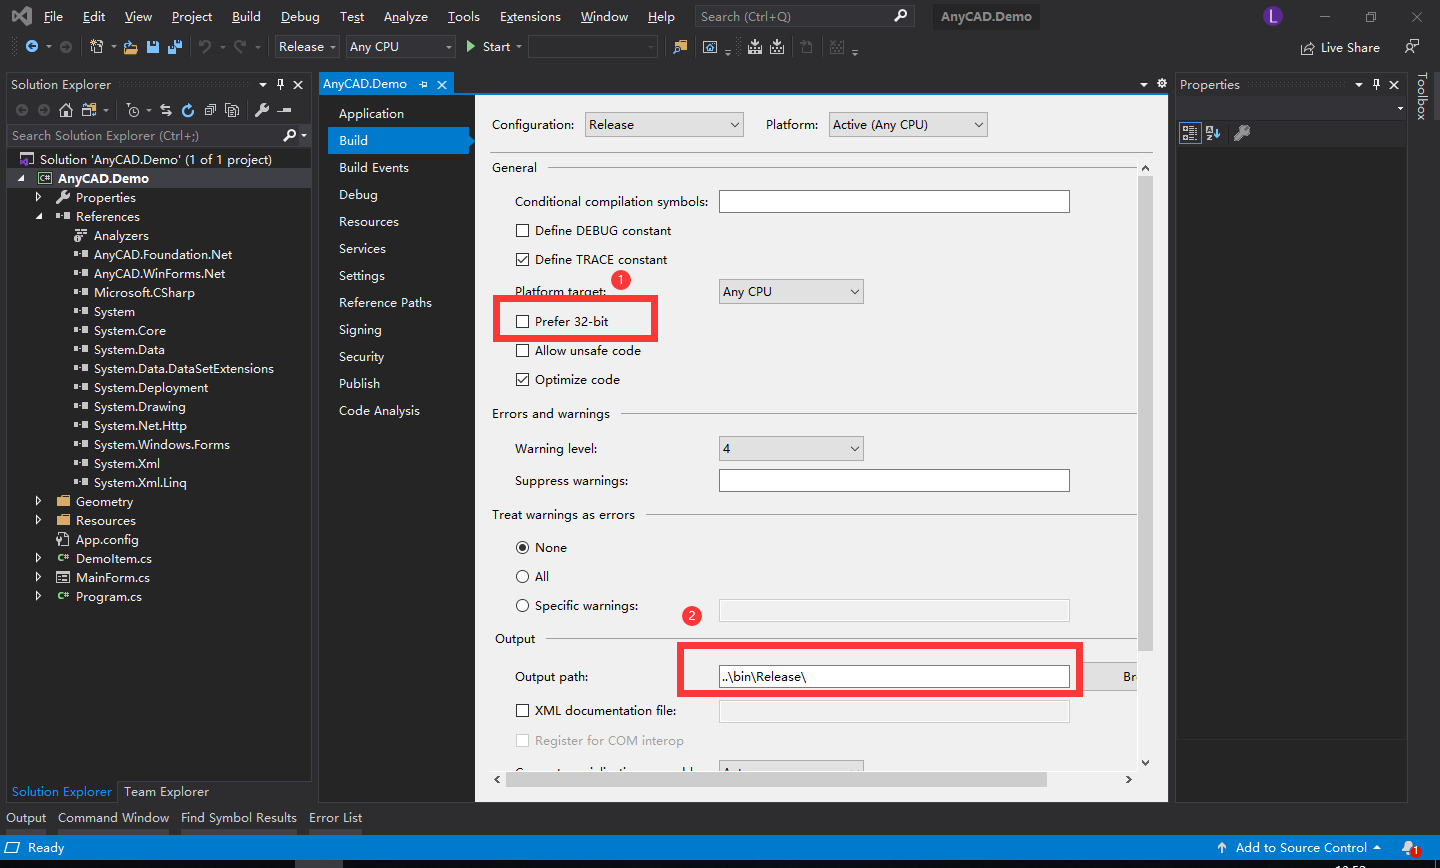
WinForms .NET项目默认为AnyCPU,为满足三维应用程序的高性能要求,建议设置项目首选64位环境,即禁用首选32位选项,如下图所示:
4 SDK初始化
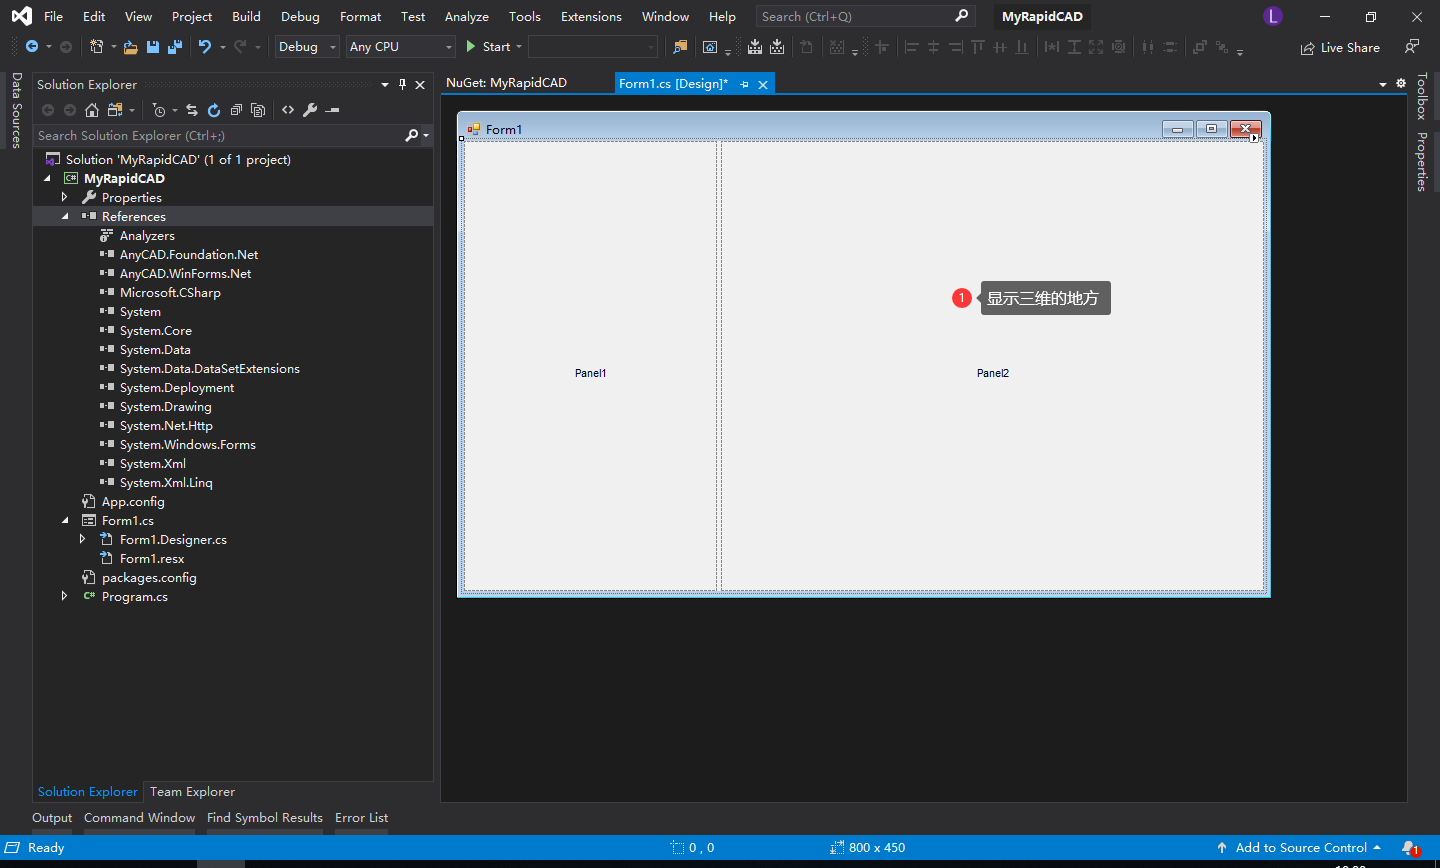
假如在窗体中增加了一个splitContainer1控件,其右边部分用于显示三维内容。
只需要在窗体的构造函数InitializeComponent()后添加几行代码,就能把三维控件添加到窗体容器中:
一行代码初始化三维控件:
    public partial class MainForm : Form
    {
        RenderControl mRenderView;
        public MainForm()
        {
            InitializeComponent();

            mRenderView = new RenderControl(this.splitContainer1.Panel2);
            // 这里不能调用AnyCAD其他的API
        }
        ...
    }
2
3
4
5
6
7
8
9
10
11
12
13
TIP
目前只支持使用代码动态添加控件到窗体中,不支持直接从toolbox中添加。
初始化和释放控件占用的全局资源:
    static class Program
    {
        /// <summary>
        /// The main entry point for the application.
        /// </summary>
        [STAThread]
        static void Main()
        {
            // 初始化
            AnyCAD.Foundation.GlobalInstance.Initialize();
            Application.EnableVisualStyles();
            Application.SetCompatibleTextRenderingDefault(false);
            Application.Run(new MainForm());
            AnyCAD.Foundation.GlobalInstance.Destroy();
        }
    }
2
3
4
5
6
7
8
9
10
11
12
13
14
15
16
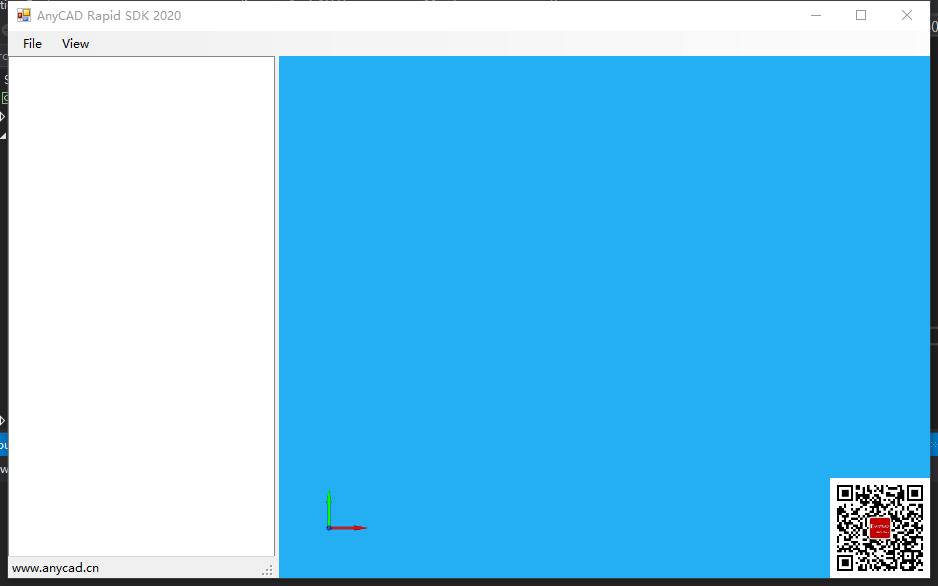
至此,可以编译和运行程序,此时应该可以看到AnyCAD的三维渲染界面:
5 导入STEP模型验证
在File菜单上增加Open菜单项,增加响应函数:
        private void stepToolStripMenuItem1_Click(object sender, EventArgs e)
        {
            OpenFileDialog dialog = new OpenFileDialog();
            dialog.Filter = "STEP (*.stp;*.step)|*.stp;*.step";
            if (dialog.ShowDialog() != DialogResult.OK)
                return;

            var shape = ShapeIO.Open(dialog.FileName);
            if (shape == null)
                return;

            mRenderView.ShowShape(shape, Vector3.LightGray); // 用灰白色来显示模型

            mRenderView.ZoomAll(); // 把模型缩放到合适位置
        }
2
3
4
5
6
7
8
9
10
11
12
13
14
15
16
17
打开一个模型测试一下:

6 小结
通过引入AnyCAD程序集、设置项目属性、初始化控件三步,即可完成WinForms与AnyCAD三维控件集成。 再结合ShapeIO就可打造一个能够浏览STEP和IGES模型的CAD Viewer了。